My Email List Grew 50% With A Quiz

Curious how a personality quiz can grow your email list? Let me break it down for you!
Quizzes are a fun, fabulous way to interact with your readers, and by adding an opt-in form to collect their email addresses in exchange for their quiz results – they are a GREAT way to gain new subscribers for your blog! And more importantly, start a conversation with people who can become lifelong followers and customers.
As an affiliate partner of various brands and sponsored content, HerPaperRoute may earn commission on qualifying purchases. Disclaimer
I’d been on the lookout for a great online quiz to offer my readers (and grow my list!) when I came across Interact. An online quiz that easily integrates with my email service provider to grow my list? Sign me up!
Here’s how it works: when someone finishes the quiz and opts in, with an intuitive, customizable form at the end of the quiz (before they are given results), they are automatically added and tagged inside your email service provider. You can even set up different sequences depending on each result so you can send personalized follow-ups based on which quiz outcome they got.
(If you don’t plan to integrate Interact with an email service provider, you can download your leads with one click.)
The quiz I built with Interact helps me not only attract quality subscribers through an easy-to-use, automated quiz, but it’s also helped me gain insight into who is hanging out on my site through getting to know their unique personalities & styles. It’s been a great way to connect with my audience and learn how I can better serve them in the future! Win-win!
Since setting this up, I’ve been able to better understand what type of content my audience is looking for by asking a few carefully curated questions…
…AND grow my email list with people who are interested in learning more about the topic I blog about: DIY projects and affordable home decor tips.
So far, so good: my quiz has a 54% conversion rate!
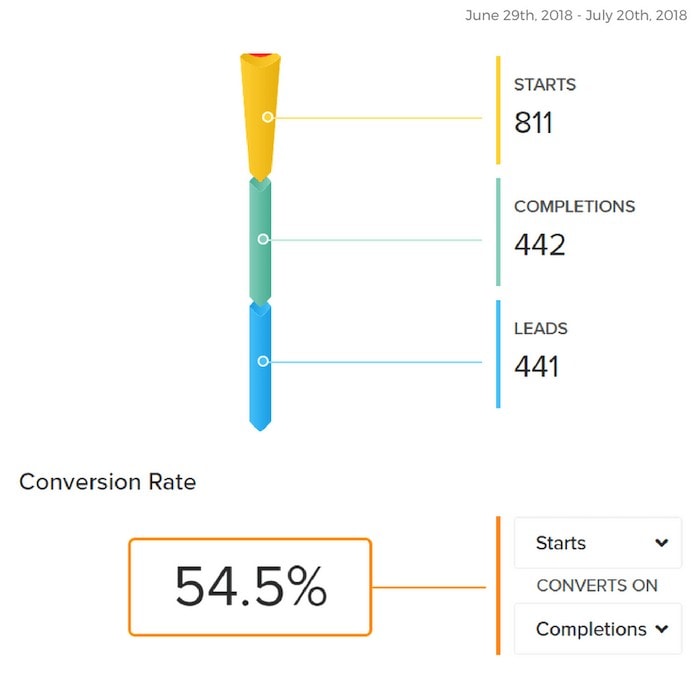
To date, of the people who’ve started my quiz, a healthy 54.5% have opted-in and joined my email list.
I’ve only had my quiz live on my site for 3 weeks and it’s already grown my list by 51%!! That has far surpassed any other opt-in I have setup, including my Printables Library that’s exclusive to email subscribers.
Below is the proof!
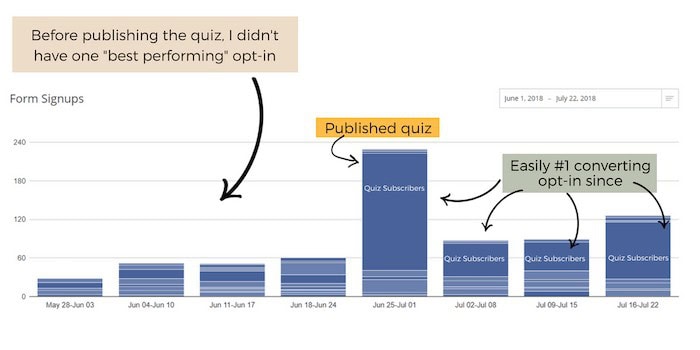
Not only did the quiz I built with Interact explode my email list growth, but I think my favorite part has been all of the comments and emails from readers who found their decorating personality fun, interesting, and (shockingly) spot on!
Are you starting to think an online quiz would work for your audience but scared of all of the tech-sperience it involves? (Totally just made that word up by the way. ?)
I gotcha covered!
Because I am such a believer in using quizzes to grow your list and connect with your audience, I’ve broken down the steps to get your quiz up and running today!
Here’s how I created my first quiz on Interact:
I found it really easy to create my first quiz on Interact, though it does take some planning and content creation up front to map it all out.
I spent about 2 hours creating the actual quiz content and embedded it on my site using the Interact tool in less than 30 minutes. It took me about 5 hours to create the personalized email sequences and set them up as an automation inside my email marketing software. (This isn’t necessary for all quizzes – but I wanted each individual result to generate a unique set of emails offering specific tips on how to use that decorating style in the home.)
Overall, I spent the majority of one day setting everything up and now my best-performing opt-in runs on autopilot. #worthit
Step-by-step tutorial to create your first quiz:
Step 1: Login to your Interact account
Step 2: Select the ‘Create New Quiz’ button in the top right corner of the page
Step 3: Choose to use one of Interact’s templates or start from scratch
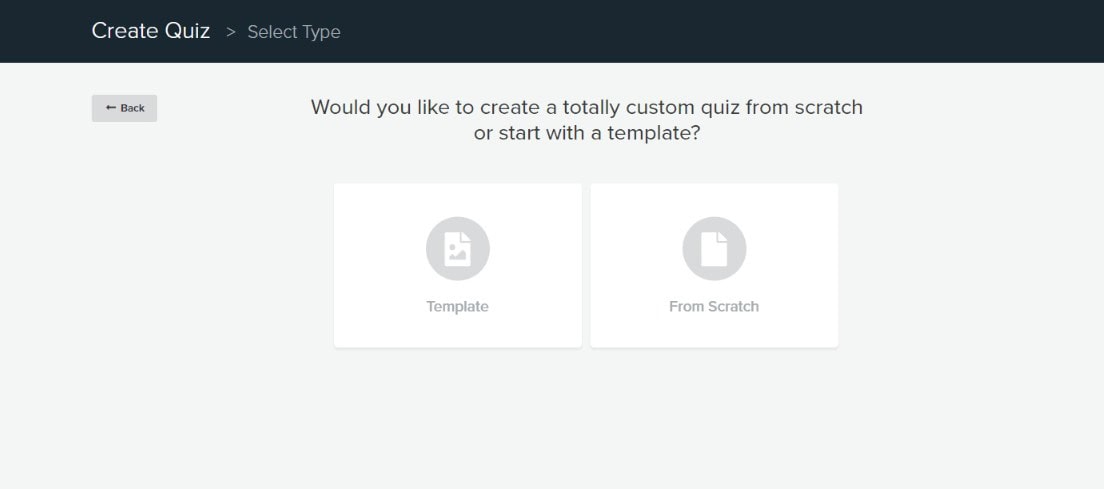
If you’re a tech buff, building a custom quiz from scratch may be fun. But for all of us first-time-quiz-creators, I’d recommend using one of their easy to use templates!
For the sake of this tutorial, we will continue with one of the templates.
Step 4: Choose the category your quiz will be about.
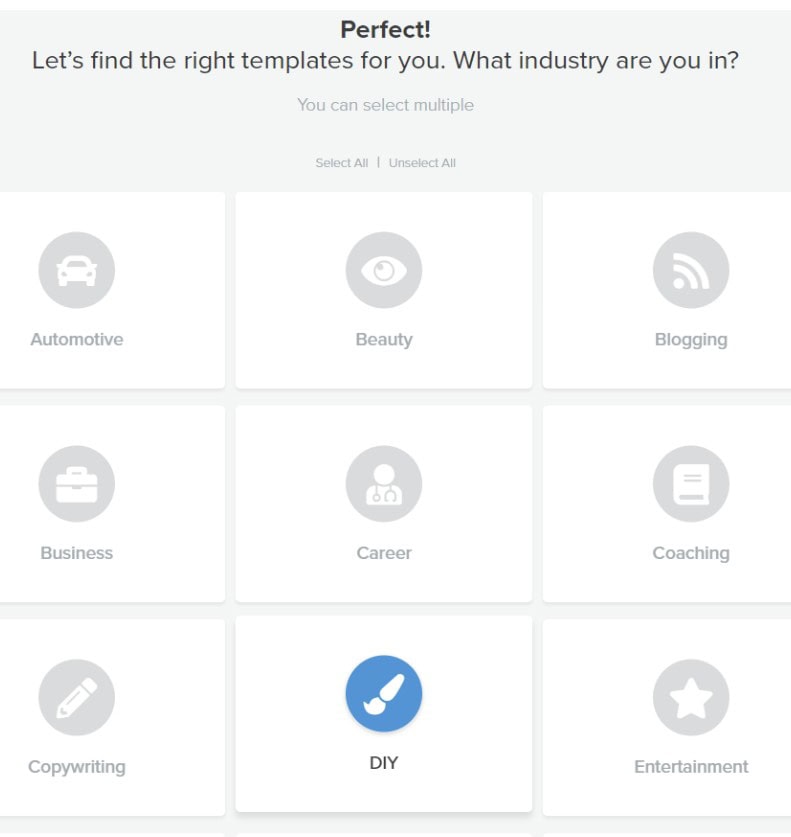
Step 5: Choose the type of quiz you’d like to make (Assessment, Personality, or Scored)
The most popular quiz type for growing an email list is the Personality Quiz. I am a sucker for these types of quizzes and will gladly surrender my email address to get my results.
Personality quizzes are fun to take, and the best ones combine curiosity with the promise of categorizing themselves and figuring out “what it means.”
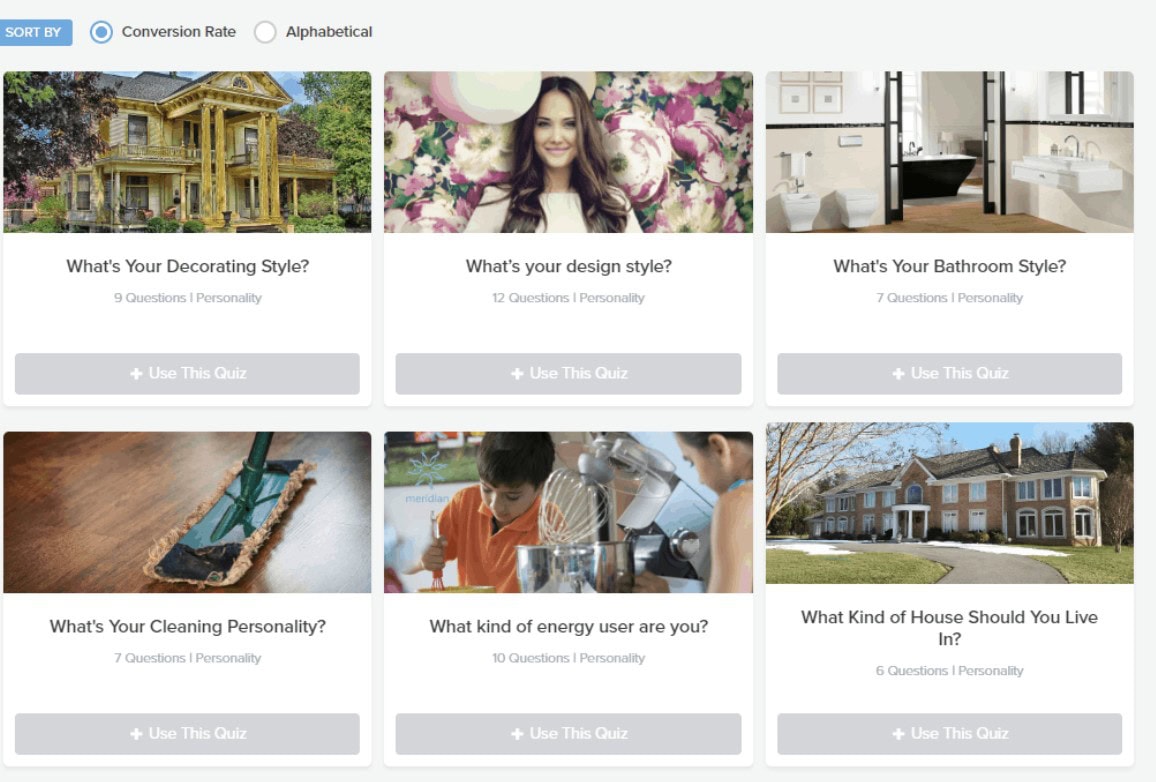
Step 6: Preview the templates and choose which one you like best
Step 7: Enable lead capture and data collection (don’t forget this step!)
- Customize your opt-in form with the data you want to collect from your subscribers and choose colors to match your brand. Be sure to include 2 things on this email capture form:
- 1) let quiz takers know that the very next step after the opt-in form is to see their results, and
- 2) pique their interest telling them you will send personalized tips on how to utilize their unique results.
- Select whichever email service provider you use or simply choose the .csv file download.
- Choose the list you’d like the subscribers to go to. I created a Design Quiz segment in ConvertKit for my quiz because I like to track how many subscribers that particular opt-in is collecting. From there, I set up individual email sequences for each of my quiz results so I can deliver design tips tailored to each style. (This is one of my favorite things about using quizzes to grow your list, you can get tons of info from your quiz taker to better serve them in the future!)
Next comes the fun part, customizing your quiz to fit your audience and brand!
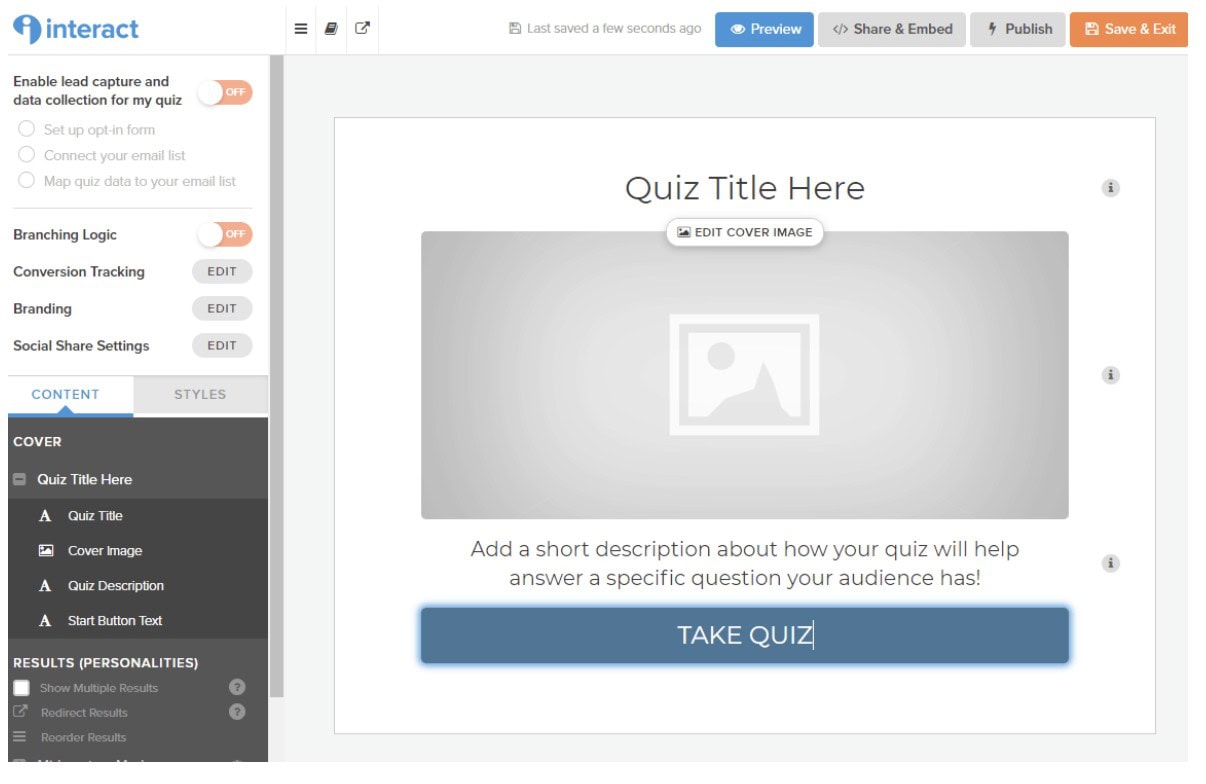
Step 8: Setup your cover page
With customizable colors, images, logos, headers, etc., Interact Quiz Builder makes it super easy to customize your quiz so it really matches your brand. You can upload your logo, choose your colors, and select from a list of fonts.
Step 9: Create your questions
Work through creating your questions and be sure to add an image to each question.
Here’s a couple of tips when designing your questions:
- Stick to 5-10 questions – this should be enough to get to know someone taking the quiz but not so long that it gets boring and people leave before finishing
- Speak like yourself – write the questions as if you were sitting across from someone who would take your quiz and actually asking the questions
- Use lots of images – we process images much faster than text so if you have an image for each answer (with a short description), it’s easier for the quiz taker to pick an answer quickly
Step 10: Design your results page(s)
You can either design your results page using the Interact results page template or link to a specific page on your blog. Whichever option you choose, make sure you offer lots of helpful information specific to their results AND include a call to action at the bottom. You want to make sure your new subscriber feels like the information you’re giving them is super helpful and worth giving you access into their sacred inbox! Don’t skimp here!
Interact makes it easy to add a call to action button to each result where you can then link to a helpful blog post you think the quiz taker would enjoy.
Another idea would be to ask the quiz taker to share their results on their social media platforms. And yep, you guessed it, Interact thought of that too! 🙂
Step 11: Publish your quiz!
After you’ve previewed your quiz and everything looks good, it’s time to publish!
I recommend publishing it across all your social channels and share it on your website. You can either embed it on relevant blog posts as a call to action, or you can create a new blog post just for the quiz. It’s up to you!
Interact makes this step super easy by giving you a simple embed code to add to a page on your site where you want your quiz.
Since this opt-in is performing so well for me, I have added it to the top of every page on my site, included it in my navigation menu, and also added it to the bottom of relevant posts.
I like including the quiz at the end of relevant blog posts for 2 reasons:
- When you add a quiz at the end of a blog post, you draw users further into the content, and create a stronger connection.
- If a reader has made it to the bottom of a blog post, they likely enjoyed what they just read and are ready to go a little deeper.
If people aren’t taking my quiz, it won’t be because they can’t find it! 😉
Who is this for?
Using Interact quizzes is a great option if you:
- are looking for a way to connect more deeply with the people you want to serve
- want to showcase your brand and unique value in a way that entertains AND informs
- are looking for an opportunity to generate more interest in the tips and services you offer
- want to watch your email list explode while giving your subscribers real value (that’s also fun!)
The reason quiz funnels work so well is that so many of us actually enjoy taking online quizzes. I mean, who isn’t curious about what their favorite pizza topping says about their personality? 😉
The people-pleasing power of quizzes paired with your awesome tips and resources makes this my favorite type of opt-in! And the results speak for themselves. In just 3 weeks of my quiz being live, I have grown my email list by over 50%!!
Want to try Interact for yourself?
It’s easy to get started and try it out with a FREE trial! I would recommend starting your trial the day you plan to make your quiz. That way, you can publish your quiz, start collecting email addresses and determine whether it’s a worthwhile investment for you.
They offer a couple of different monthly plans, so it’s easy to find the right fit for your needs.
Start converting your traffic into subscribers and learn more about them at the same time. You can create your custom quiz, keep it on-brand, and add it directly to your website in a matter of minutes!
Follow along on Instagram!


