How to Make a Vision Board That Actually Works: 6 Easy Steps
This is wild, but, I can personally attest to the power of making a vision board because everything on my board came true!
My vision board style is a little different than what you may have heard other people talk about before. I create my vision board with simplicity in mind. In fact, I don’t even make a collage!
As an affiliate partner of various brands and sponsored content, HerPaperRoute may earn commission on qualifying purchases. Disclaimer
Ready to turn your dream into reality? Then it’s time to figure out how to make a vision board that actually works–spoiler alert: it’s not that hard.
In this post, I’ll share my vision board that came true, and guide you through creating a vision board of your own. I will also provide a tutorial on how to make 2 other types of vision boards so you can create the one that’s best for your goals. Let’s start manifesting your dream life into reality – read on!
What Is A Vision Board?
A vision board is a visual representation of the goals you want to achieve. It’s a powerful tool that captures the essence of your goals, and sets the stage for them to unfold.
What does a vision board look like?
A vision board can look however you want it to! It is your creation, and there are no rules.
Some people will cut images out of magazines that represent their dream life (a beautiful home, a new car, abs, a dollar amount they want to earn in their business, etc), and then make a collage to hang on their wall.
Others will use a digital vision board they can use as an app on their phone.
I like both styles, physical and digital and I use both. However, instead of creating collages, I just use Post-it Notes and words!
Now, I will walk you through these three types of vision boards.
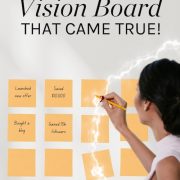
Vision Board Style 1: My Post-It Notes Vision Board That Came True
Gathering your supplies is the first step in creating a vision board. It’s what you’re going to use to visualize your goals and dreams.
1. Gather A Few Simple Items
For this style of vision board, you will just need some Post-It Notes, a poster board and a notebook.
Any size poster board is fine, it’s up to you. For example, this kind.
- A Board: Choose a corkboard for flexibility or a poster or foam board/large paper for a fixed layout.
- Post-It Notes: Any color you like!
- Notebook: Any color you like!
- GET ORGANIZED: Each pack includes 5 pads of 3 in. x 3 in. notes, with 70 sheets per pad, great for your office, work area, or classroom
2. Set Your Intentions
Setting your intentions is a critical step in creating a vision board that reflects your aspirations. Start by clearly defining what you want. Vision boards are to truly visualize, so avoid anything vague. Clearly envision what success and happiness mean to you.
In an ideal scenario, your goals will cover the various areas of your life. However, this could be more specific if you’re creating a more focused board.
To begin, you will need to do some brain-dump journalling. In your notebook, write out:
- All the things you did well/accomplished last year
- All the things you failed at last year
- Things you see other people do/have/be that you want to do/have/be
- All of your craziest, seemingly impossible goals
Writing these goals down makes them more tangible and solidifies your commitment to achieving them. Align these objectives with your core values to ensure your journey is both meaningful and satisfying.
Then for each goal, attach a feeling, a timeline and a reward.
Visualize the fulfillment of each goal, as this practice boosts motivation and focus. Set achievable timeframes to maintain a sense of urgency, but stay adaptable.
Life changes, and so may your goals. Your vision board should be a dynamic reflection of your evolving aspirations.
3. Write Each Goal On A Post-It Note
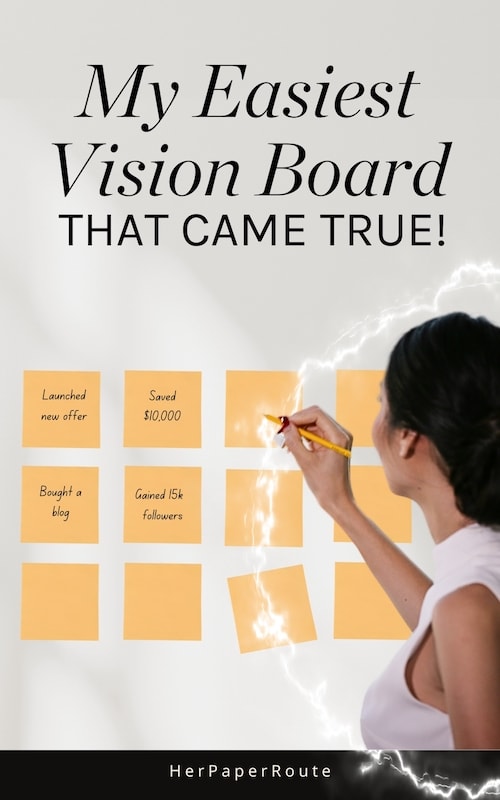
Next, write each goal on a Post-It and place them on the left side of the board.
Write it in past tense, as if you have already achieved it. For example:
- “Published my book.”
- “Launched my coaching program.”
- “Got 200,000 pageviews.”
4. Add Affirmations
Adding affirmations to your vision board brings your personal aspirations to life, serving as both motivation and a guide.
Choose empowering affirmations that resonate with your journey, such as “I am capable of great achievements” or “Each step brings me closer to my goals.” Write these statements boldly, ensuring they stand out to continuously inspire and remind you of your inner strength.
5. Display Your Vision Board
Finally, hang it somewhere you will see every day.
Choosing the right spot to display your vision board is important for its impact on your daily life and personal aspirations. Place it in a high-visibility area where you’ll see it often, like near your workspace, bedside, or in the living room.
The goal is to keep your goals constantly in mind. Ensure the space around your board isn’t cluttered, as a clear area fosters a clear mind.
Your vision board should ideally be a focal point in its location, noticeable but not overpowering. Good lighting is essential, natural light is best, but well-placed artificial lighting works too. If the content is personal, consider a semi-private spot where it’s visible to you but not to everyone.
Don’t hesitate to change its location occasionally for a fresh perspective. Also, create a space nearby for reflection, like a comfortable chair, where you can sit and absorb the content of your board.
Thoughtfully displaying your vision board in this way transforms it into a powerful, daily reminder of your personal journey and goals.
I will say, that once I stood back and looked at mine, I did feel a rush of motivation I hadn’t felt in a LONG time. I also felt a nice calmness now that I have some clarity about what I want to focus on this year.
6. Appreciation Ritual When A Goal Is Completed
As you complete each goal throughout the year, move the accomplished post-it to the right side of the board, while thinking about how grateful you are in the moment.
Make sure to celebrate each achieved goal to acknowledge your progress. Be flexible, allowing your goals and affirmations to evolve with you.
This approach transforms your vision board into a dynamic tool, not just visualizing your success but actively shaping and tracking your journey toward achieving your personal dreams.
Vision Board Style 2: My Digital Vision Board That REALLY Ramped Things Up (And Also Came True!)
Once I had a few wins with my Post-It Notes vision board, I decided to make a more advanced digital version.
This way I can use it on my phone, take it everywhere with me, and share it as a template so that other girlies can use it themselves.
The digital vision planner turned out SO WELL that I couldn’t keep it only for myself.
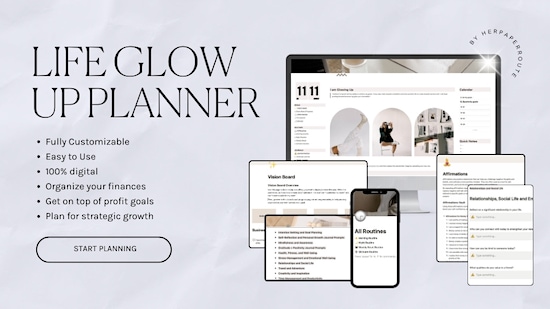
The Life Glow Up Planner is a total life dashboard that includes:
- Vision Board
- Morning Routine Evening Routine, Sunday Reset
- Daily To-Do Lists
- Yearly, Quarterly, Monthly, Weekly Goals
- Affirmations Library
- Journal Prompts
- Gratitude Journal
- Dream Journal
- Habit Tracker
- Fitness Tracker + video library
- Skincare Routine + Inventory
- Budget Sheets + Financial Goals
- BONUS Meal Planner
You can get a copy of the planner here!
Vision Board Style 3: Collage Style
A collage-style vision board is the most well-known style. Here’s how to make a collage vision board.
Order Your Supplies
If you will make a collage vision board, you will need:
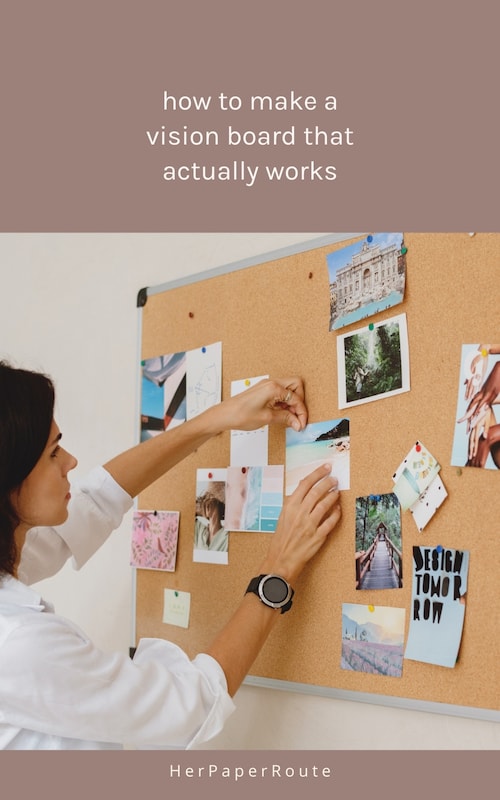
- Select Your Board: Choose a corkboard for flexibility or a poster board/large paper for a fixed layout.
- Find Inspirational Images: Look through magazines, photos, and printouts for images that resonate with your aspirations.
- Personalize with Photos: Add your own photos to make the board uniquely yours.
- Necessary Tools: Keep scissors handy for cutting and glue or tape for attaching items.
- Decorative Touches: Use markers, pens, and stickers for personal flair and motivational quotes.
- This value pack comes with 100 art boards in white
While you can use ANYTHING to bring your vision board to life – it’s YOUR vision – here are a few things we recommend adding to your supplies checklist:
- Board: Corkboard, poster board, or large paper.
- Images: Mix of magazines, photos, and printouts.
- Personal Photos: For a unique touch.
- Cutting Tools: Scissors.
- Adhesives: Glue or tape.
- Decorative Items: Markers, pens, stickers.
This preparation sets the stage for an inspiring process, helping you visualize and bring your dreams to fruition!
Set Your Intention and Find Images and Words That Reflect Those Goals
Scroll back up to vision board #1 to read my tips about how to set your intention.
Next, Creating a collage-style vision board involves carefully choosing images and words that resonate with your personal aspirations. Look for visual elements that align with your goals and stir emotional responses, as these deepen your connection to your aspirations.
I recommend incorporating a mix of visuals for a more dynamic and engaging look.
Aim for varied colors and textures, to make your board aesthetically pleasing. Then personalize it with handwritten notes or drawings, adding a unique touch.
Be selective of what you add to maintain clarity and focus. Your vision board should be a personalized collection that inspires you and reflects your journey, helping to bring your dreams to life.
Arrange Your Collage
Arranging your vision board is where your personal aspirations start to take visual shape. Begin by laying out your images and words, experimenting with different layouts. This exploratory phase allows you to visualize without commitment.
Consider organizing your collage vision board by themes, such as personal growth, career goals, or health and wellness. This can aid in creating a focused and coherent vision.
Pay attention to the visual flow; place larger, key images in prominent spots, surrounded by smaller, supportive elements. This helps convey the importance of each goal.
Aim for a balanced and harmonious arrangement that feels right to you, with a thoughtful mix of colors, textures, and spacing. The goal is to achieve a visually pleasing composition to your mind, that inspires calm and motivation.
Glue Everything Down
Securing your items on the vision board marks a significant step in actualizing your personal aspirations. This process is about commitment to your goals and vision.
Begin gluing with the larger elements, which form the foundation of your vision, and then layer on smaller images and words. This creates a dynamic, textured look.
Periodically step back to check the alignment and overall balance, ensuring everything is placed as intended. But don’t worry too much about imperfections as they add authenticity to your vision board.
If you want a more permanent look and feel to your board you can consider using a clear adhesive spray to conceal and preserve your work.
- All purpose glue: Gorilla spray glue is heavy duty and multi-purpose; it bonds glass, plastic**, wood, metal, ceramic, rubber, leather, paper, and more
Reflect on each element as you attach it, reinforcing your connection to your goals.
This step is where your dreams start taking tangible form, marking a significant moment in your personal growth journey.
When is the Best Time to Make a Vision Board?
There is no right or wrong time to make a vision board.
That said, the best time is going to be when you feel ready for a change or are eager to set new goals.
Note this doesn’t have to be at the start of the new year (though it can), you could also do it seasonally or even when you have a significant life event.
You’re looking for any moment to inspire reflection and planning, making them ideal for envisioning your future.
It’s less about the perfect time and more about when you’re most open to dreaming big and setting meaningful, achievable goals for your personal and professional growth.
Read this next: How to Make a Money Vision Board.
Follow along on Instagram!


