How To Install WordPress With Bluehost

In this guide, you will learn how to install WordPress with Bluehost.
It is super easy to install WordPress using Bluehost as your web host, and you will be able to do it in just a few minutes!
As an affiliate partner of various brands and sponsored content, HerPaperRoute may earn commission on qualifying purchases. Disclaimer
Bluehost is not a fancy host by any means, it’s a bargain host! I actually recommend this host as the better option overall.
But the reason many people use Bluehost is that Bluehost’s dashboard is very easy to set up as a newbie blogger.
Bluehost is a great choice for a new blogger, as they make it super easy to set up a website in 5 minutes, and it is cheap!
If you would like more in-depth info, such as picking your niche, how to writing content, email marketing, monetization, SEO and more, sign up for my free blogging course.

In this post, I will review the technical aspect of starting a blog with Bluehost.
You can start your blog the way that suits YOU. And yes, you can get started blogging even if you are on a strict budget.
If you can afford $3 per month, you’re good to go.
What About Free Blogging Platforms?
There are a ton of companies that advertise “free hosting” (such as Weebly, Wix, Blogger, WordPress.com) but they are not free at all, and actually are WAY more expensive.
There are several reasons why you should spend the money to purchase hosting.
When you purchase hosting, you own your “property,” whereas if you are using a free blogging platform, you can lose that property at any point in time, along with all your hard work.
If you ever plan on making money from your blog or website, freelancing your service, or turning your site into a business of any kind, then buying hosting is an absolute must!
It doesn’t have to be expensive at all to get a blog started. You don’t need $1,000s to invest to get started like with a brick and mortar business. When you have a site that you pay for hosting or a self-hosted site, you can do with it whatever you want.
You can run your own ads, use affiliate links, participate in direct advertising, sell your own products, the list goes on.
It’s like renting a house versus buying a house. When you buy your own house, you can do whatever you want with it. Whereas when you rent, you pretty much have no options, like white versus off-white paint.
Making money on a free blogging platform is VERY difficult. So don’t count on it. Many advertisers and companies won’t even consider working with a blogger that uses a free blogging platform.
They are seen as unprofessional.
It looks much more professional when you have a self-hosted site. Yourdomainname.com looks much better than yourdomainname.blogger.com.
Plus, when you have a self-hosted site that shows companies that you are willing to invest in your business.
This means you are serious and they will be more likely to invest their time and energy into you.
How To Install WordPress With Bluehost: First Steps
To get started using a website with Bluehost, first, you will need to register a domain name, if you don’t already have one.
1. Domain Look Up
You can do this by checking if your desired domain name is available by entering it in the form below, or by going to Bluehost and clicking the green ‘Get Started Now’ button.
Simply type in the name you are looking at (without a .com or anything behind it) and whatever is available will show up.
2. Bluehost Web Hosting Plan Options
What Is Web Hosting? Web hosting is like buying land to build on. Your website is your house, and your domain is your address. And the Internet is your neighborhood.
You need to pay for web hosting so that your website can be live on the Internet, where other people can visit it.
This is called self-hosting. When you self-host, you get WordPress.org for free, which is the program you use to create your website.
Basic web hosting is really cheap. You only need to spend $3 to have a completely self-hosted blog that you own entirely.
Bluehost is the perfect solution for a new blogger. They are cheap and newbie-friendly, giving you everything you need with zero tech knowledge needed on your part. They have simplified the setup process so that your website can be up and running within minutes.
I started my first blog with Bluehost, and still do host a few of my sites with them, all these years later! I can personally vouch for the outstanding customer service. They are timely and extremely helpful.
Some of their features include:
- 30-day money-back guarantee
- 1-click WordPress installation
- 24/7 customer support
- A free domain
Now, choose your plan. The first time I hosted with Bluehost, I chose the basic plan, which was OK.
But I ended up wishing I’d just gotten the prime plan, as you get way more space and features for only $2 more per month.
Also, you can only host one website on the basic plan, whereas on the prime plan, you can host unlimited websites which is awesome.
At this point, I am going to assume that you are only going to be working on 1 site, so the Basic plan should be enough. You can always upgrade at a later date if needed.
To get the best deal, Bluehost offers its lowest price package for 36 months.

If you’re really on a budget, you don’t have to get any of the extras. But you should purchase domain privacy, that is super important.
Follow the steps below to purchase hosting for your blog.
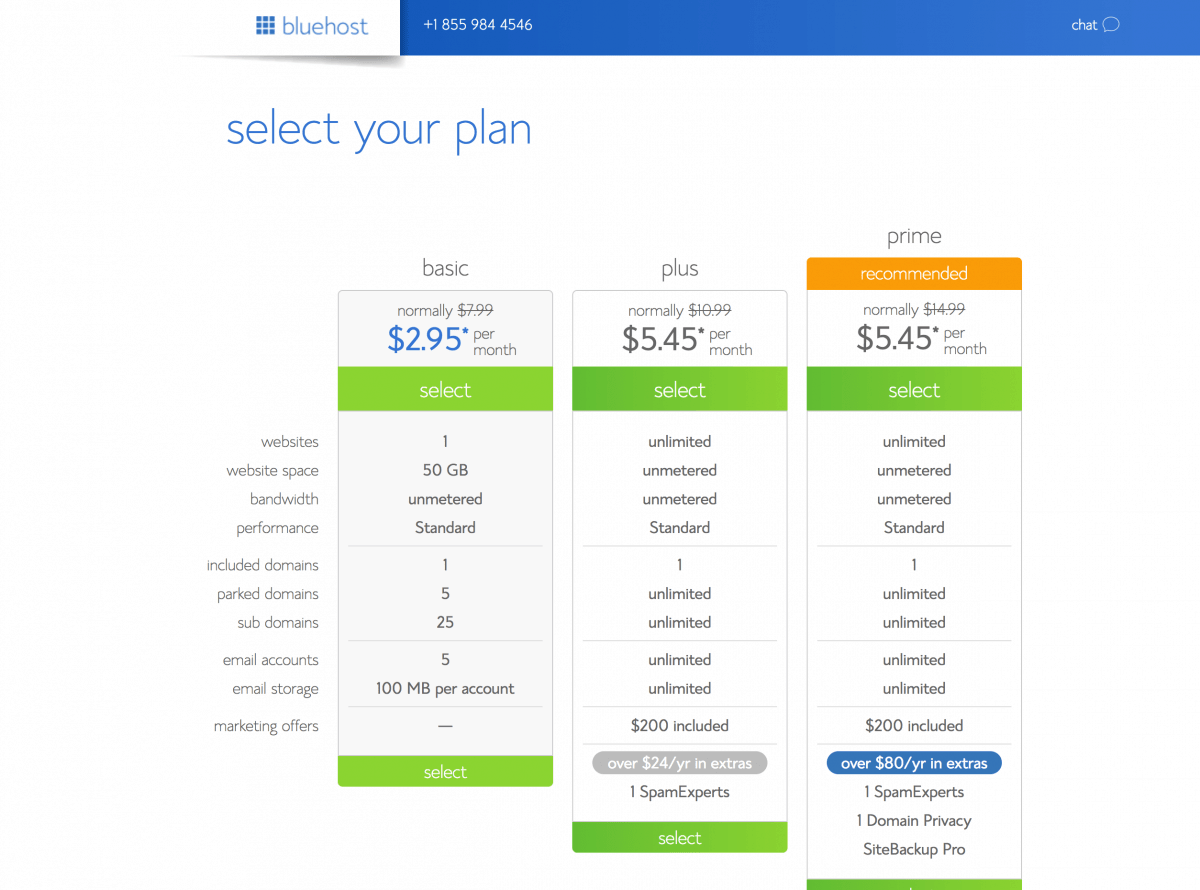
Also, domain privacy is included in the prime plan, which is very important, as you will end up paying for it separately with the other plans.
Domain privacy means that it hides your personal information such as your name, phone number, address from appearing online in WhoIs. It costs about $2 per month to add privacy on later.
I’d recommend it. If you don’t have domain privacy, anyone can look up your website and your information. And I mean anyone!
Whichever you choose, you can lock in the promo price for a set term, which is a great incentive that Bluehost offers to their customers.
You can register for 3 years and keep the promo rate for all 3 years, for example. And after that term, it will go to the regular non-promo price.
- Go to Bluehost and click the “Get Started Now” button.
- Click on the package you are interested in.
- Sign up for a new domain name. Or if you already have a domain name, enter it here.
- Enter your personal and payment information.
- Next, you will be asked to enter a password. Make sure it’s a good password and secure.
If you are curious about other web hosting options, take a look at this list of the best web hosting providers.
3. Domain Registration
Next, you get to register your domain! Enter your choice of name and Bluehost will let you know if it’s available.
Or if you already have a domain registered somewhere else, you can add it here.
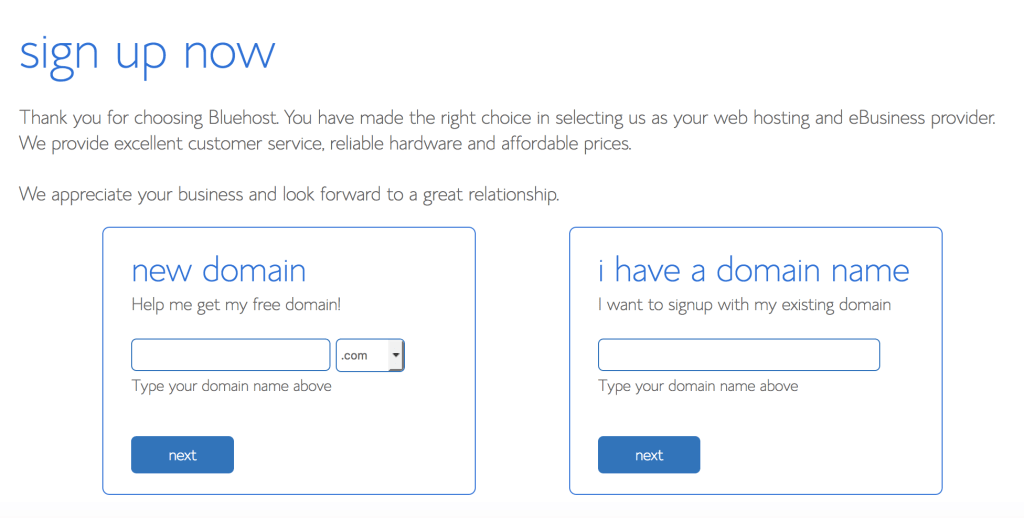
Next, you will be able to enter your contact information.
You will pay for your hosting term all at once now, as opposed to month-to-month.
Lock in the promo rate by registering for a longer term.
Click to agree to the terms, and click ‘next.’
A screen will ask if you’d like to choose a theme. You can pick a random one for free for now, or just click ‘skip’ because you can add your theme later.
Follow the prompts, and soon you will be on your Bluehost dashboard. Click ‘My Sites’ and then hover over your site and click ‘Log Into WordPress.’
4. Set Up Your Bluehost Dashboard
Now you should be taken to the ‘Sign up successful’ page where you can create a password.
This will be your login to access all of your website’s foundation content and hosting information, it’s important, so make sure you remember this password.
And make it a good password that no one could guess, as even if you are a small blog, there are still people who will try to hack into it.
Alright! Welcome to your dashboard.
5. How To Install WordPress.org With Bluehost
Now, how the heck do you actually set this hosting up?
I promise, it’s not as scary as it initially feels. Bluehost makes setting up your website super simple.
Click where it says ‘My Sites’ and then click the blue button ‘CREATE SITE’
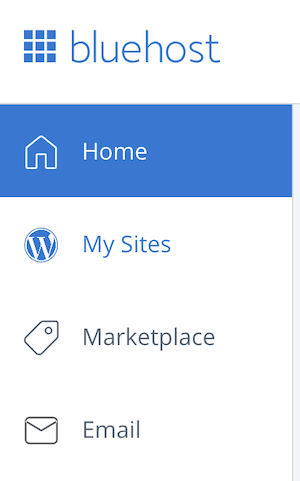
You will be prompted to install WordPress. Give your new site a name, and let the installer do its magic.
Once WordPress installs, you may be prompted to choose a theme from Bluehost’s Marketplace.
You don’t have to choose a theme just yet, we will get to that in a moment.
6. How To Log Into WordPress From Bluehost
From your Bluehost dashboard, you can click ‘My Sites” and then click ‘Log Into WordPress’ at any time, and you will be taken to your WordPress dashboard. This will automatically log you in.
But its worth knowing that you also have a WP login page which can be used at any time, without you having to log into Bluehost first.
Next time you want to log into your site, you can do so by going to yourdomain.com/wp-admin, which looks like this:
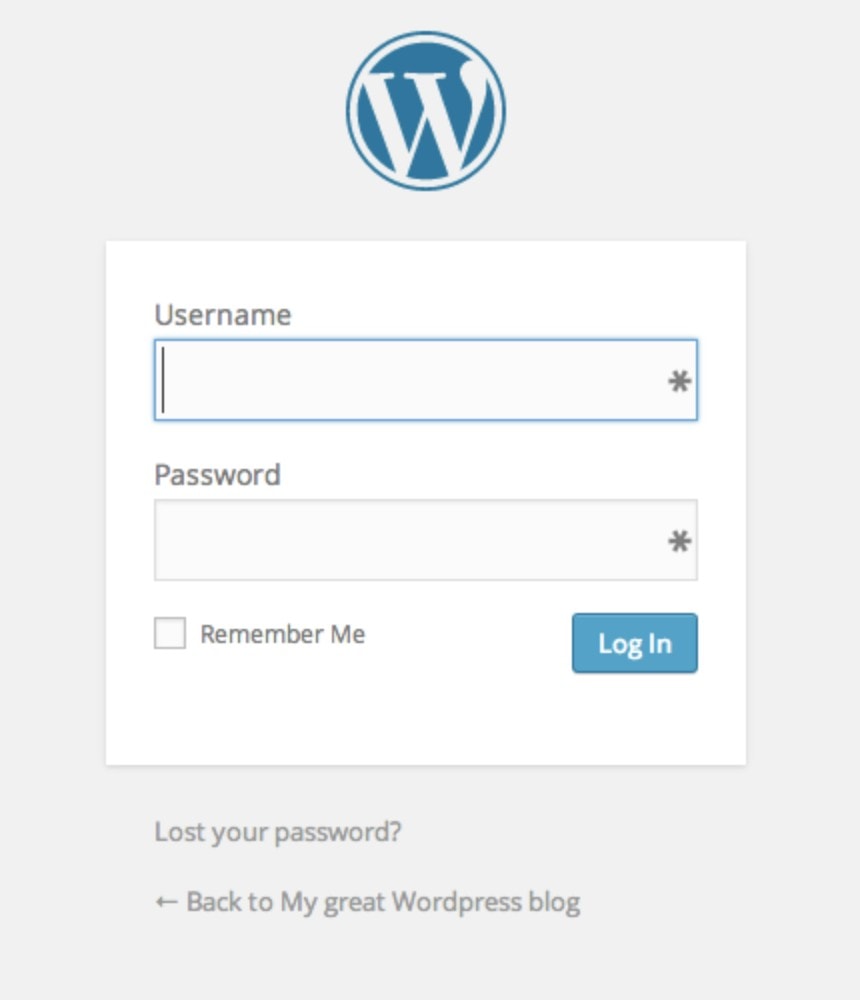
You can always access this login page at any time by typing www.yourdomain.com/wp-admin into your address bar.
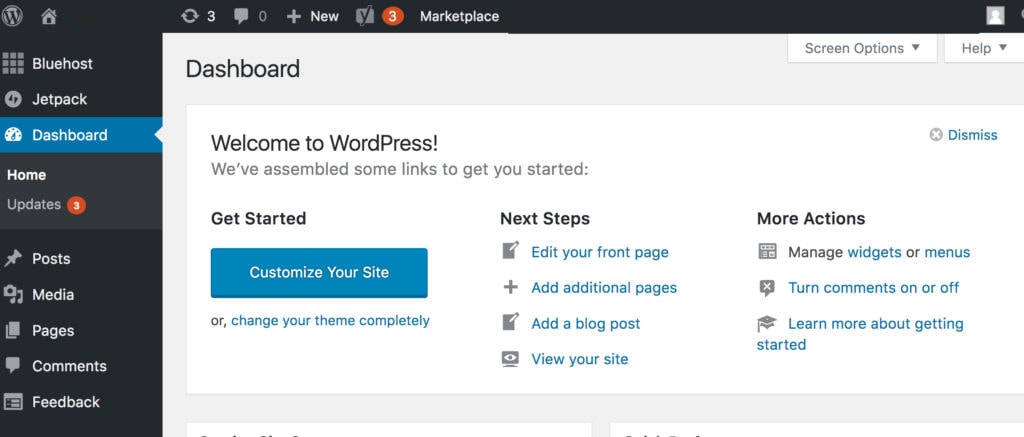
Once logged in to WordPress, you will be on your WordPress dashboard.
On the left side is where you will see tabs to create pages and add your first post. Take some time to familiarize yourself with this dashboard – you will use it a lot!
7. How To Install Secure HTTPS With Bluehost
Bluehost now provides free SSL certificates for all assigned and parked domain names set up in your account
How to activate your free WordPress SSL Certificate
In most cases, the SSL will automatically assign and install itself to your new and existing domains; however, some customers may need to manually enable the certificate
- Log into your Bluehost control panel (CPanel)
- Click ‘My Sites’
- Hover over your site and click ‘Manage Site’
- On the next screen, click ‘Security’ and then beside Free SSL Certificate, turn the switch to ‘on’
The screen looks like this:
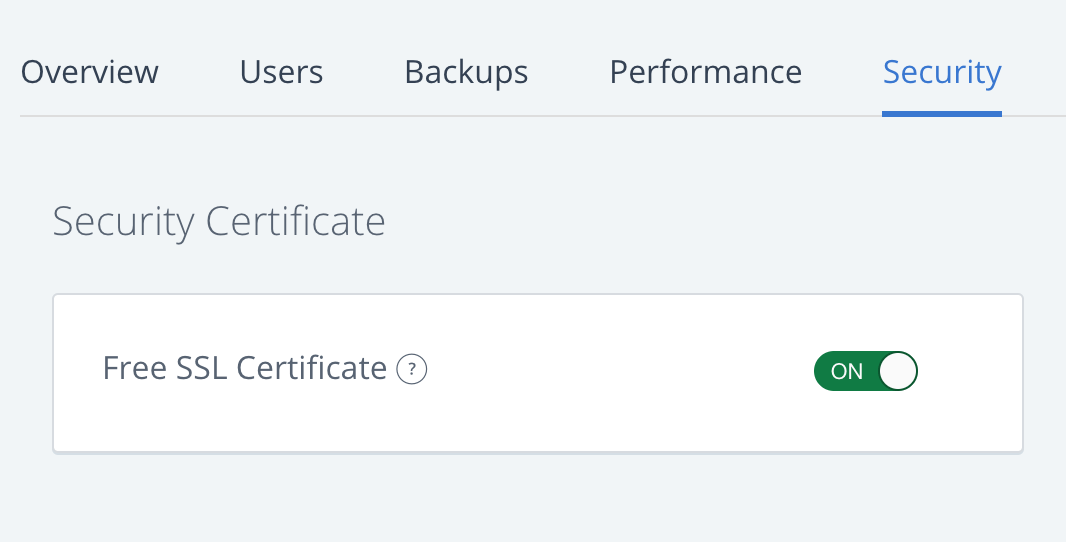
Once you’ve turned the SSL on, it can take a few hours to install and activate. In some situations, you may need to take action to complete the process. If so, you’ll receive an email with instructions.
Once that is complete, you will have a working SSL certificate for your domain name!
8. The Important Next Steps
Now it’s time to set up your theme and set a few important settings.
For that, head on over to my free blogging course and enroll, as it shows you exactly what to do now. With video tutorials and step-by-step WordPress guides!
How To Install WordPress With Bluehost – Conclusion
That was easy, hey?
Ok, now that you have installed WordPress with Bluehost, it’s time to design your new website and monetize it so you can start making money! Read this post to learn how to do all of that, now!
More Blogging Tips
- What Is A Blog?
- Blogging Tools & Deals
- New Blogger Mistakes To Avoid
- How To Make Money Blogging
- How To Get Blog Sponsorship Deals
- Easy! Turn Blog Readers Into Subscribers
Follow along on Instagram!


